
Showing posts with label My Designs. Show all posts
Showing posts with label My Designs. Show all posts
Monday, November 12, 2018


Sunday, October 28, 2018

Saturday, December 2, 2017

Monday, March 6, 2017

Monday, November 9, 2015
Minion ornament


I did add the gray goggle around the eyes on these also.

Sunday, November 1, 2015
Mary Ann's Angels/Icicle Angels
Mary
Ann's Angels
revised
11/01/2015
Use
F or G hook, and sport weight or baby yarn. 1. Ch. 4, dc 16 in 4th
ch. from hook. Join in 1st dc ( not in top of chain 4) ch. 4 turn.
2.
3 trc in same space, ch 2, turn. sl in 2nd chain and next 3
stitches, join in same stitch as trc's, sl in next st., ch 3, 2 dc
same stitch., 2 dc next stitch., ch 3, sl in same st., sl in next
stitch., ch 4, 3 trc same st., ch 2, turn, 4 sl across top of wing,
ch. 4. sl in same space as trc's , dc next space, join in top of dc.
3.
Ch 3, 2 dc in same st., 2 dc in ea st across, 3 dc in end st. ch 1,
turn
4.
sc, chain 3, sc across. Fasten off and weave in ends. Tie ribbon or
yarn around neck. Add tie to back of head.
Icicle
Angel
crochet
as above through row 3. 10 dc, ch 1 turn
decrease
next row down to 6 dc, ch 1 turn
sl
in to center stitch and start icicle by chaining 20
you
may also add another color here.
4
sc in ea ch to form the spiral and join at the point.
To
form the halo, attach gold yarn into the 4th stitch above
the right wing.
Sc
in next 6 stitches, chain 8 and sl to beginning of halo. Fasten off.


Monday, June 1, 2015
Mary Ann's Crocheted Angels
Use
F hook, and sport weight or baby yarn.
1.
Ch. 4, dc 16 in 4th ch. from hook. Join in 1st dc ( not in top of
chain
- ch. 4 turn.
2.
3 tr in same space, ch 2, turn. sl in 2nd chain and next 3 stitches,
join in same stitch as tr's, sl in next st., ch 3, 2 dbl same
stitch., 2 dbl next
stitch.,
ch 3, sl in same st., sl in next stitch., ch 4, 3 tr same st., ch
2,
turn, 4 sl down top of wing, ch. 4. sl in same space as tr's , dbl
next
space,
join in top of dbl.
3.
Ch 3, 2 dbl same st., 2 dbl in ea st across, 3 dbl in end st. ch 1,
turn
4.
sc, chain 3, sc across.
Fasten
off and weave in ends. Tie ribbon around neck. Add tie to back of
head.
**This
pattern is for personal use or for charity


:
Saturday, December 15, 2012
Spiral Santa

designed by Mary Ann Von Aschen
12/15/2012
Using G hook and red 4ply yarn starting at top of hat:
1. ch2, 6 sc in 2nd chain from hook, join ch1. 6Sc
2. 2sc around, join, ch 1. 12 sc
3. sc in 1, 2sc in next st around. Join ch 1. 18 sc
4. sc in next 2 stitches, 2 sc in next st around. Join, ch 1. 24 sc
5. sc in next 3 stitches, 2 sc in next st around, join. Ch 2. 30 sc.
6. Dc around 30 dc. Join, fasten off red and join white.
7. Repeat row 6 in front loops only, join, fasten off and join off white.ch 1
8. sc around in back loops from round 7, join, ch 1. 30 sc
9-12 sc around, join. Ch 1. 30 sc
13. sc in next 3 stitches, dec. around, join, ch 1 24 sc
14. sc around, join. Ch 1. 24
15. sc in 2, dec around, join, ch 1. 18 sc.
16. sc around back loops only, join, ch 1. 18 sc
17. Stuff. Sc dec. around, join, ch 1. 12 sc
18. dec around, 6sc. Fasten off and weave hole shut.
You may sell the finished product, but you may not sell the pattern or claim it as your own.
Thursday, October 18, 2012

Tuesday, October 9, 2012
headband/ear warmer

Measure
the circumference of where the headband will sit on the head for the
length. This will be how many chains you will need to crochet to
start.
With
Redheart yarn, I have found that 65 chains is good for a preteen and
67-70 for an adult, using a G hook.
- - 4 *sc in ea sc across, ch 1, turn. *4 times
Ch
desired amount, sc in 2nd ch from hook to the end. Ch 1,
turn
5.-
8 sc in 10, hdc in 10, dc across to last 20 sc. Hdc in 10, sc in
10, ch 1 turn.
Finish
off leaving a long tail for sewing. Right sides together, sew short
ends together.
Add
flower, charms etc., if desired
Outer flower:
ch
4, 12 dc in 4th ch from hook.
12
dc in ring, join.
*Ch
3, in next dc (dc, trc, dc) ch 3, sl st in next dc. Repeat from *
around. Finish off and weave in ends.
inner flower.
Ch
4, trc in 4th ch from hook.
Make
a trc but don't finish stitch, leaving 2 loops on hook, repeat again,
YO and finish the stitch, ch 3, sl st to ring.
Repeat
above directions 5 more times.(6 petals) Join and finish off with a long tail.
Attach the two flowers together and sew onto headband.
Saturday, September 22, 2012
Hello Kitty Look Alike Hat with braids

Newborn to 3 months
-14 to 15 1/2" head-
Sport weight yarn with E hook.
3 months to 1 year -16 to 19"
head-Sport weight yarn with E hook.
3 ply yarn with F hook.
6 months to 3 years -18 to 21" head-
Worsted weight yarn with H hook.
(This hat was done with H hook and Red Heart Worsted weight yarn)
Hat:
Chain 4, join.
Row 1: Ch 3, 11 dc in ring. Join with sl st. (12)
Row 2: Ch 3, dc in same space, 2 dc in each dc around. Join with sl st. (24)
Row 3: Ch 3, 2 dc in next st, 1dc, 2 dc next stitch, around. Join with sl st. (36)
Row 4: Ch 3, dc in next st, 2 dc in next st, 1 dc, 1 dc, 2 dc in next stitch. Join with sl st. (48)
Row 5: Ch 3, dc in next st, dc in next st, 2 dc in next st, 1 dc in 3, 2 dc next stitch, around. Join with sl st. (60)
Rows 6-10: Dc in each dc, slip stitch , join, Ch 3…Chain 4, join.
Row 1: Ch 3, 11 dc in ring. Join with sl st. (12)
Row 2: Ch 3, dc in same space, 2 dc in each dc around. Join with sl st. (24)
Row 3: Ch 3, 2 dc in next st, 1dc, 2 dc next stitch, around. Join with sl st. (36)
Row 4: Ch 3, dc in next st, 2 dc in next st, 1 dc, 1 dc, 2 dc in next stitch. Join with sl st. (48)
Row 5: Ch 3, dc in next st, dc in next st, 2 dc in next st, 1 dc in 3, 2 dc next stitch, around. Join with sl st. (60)
Attach trim color, sc around hat. Join, Fasten off
With white, ear flaps
1st ear flap, At end of row 5:
Row 1: Ch 1, sc in same space and next 8 stitches, Ch 1, Turn
Row 2: Sc, 2tog, sc, sc, sc, 2tog, sc, Ch 1, turn
Row 3: Sc around. ch 1, turn
Row 4: Sc, 2tog, sc, 2tog, sc, Ch 1, turn
Row 5 : Sc around. Ch 1, turn
Row 6: Sc, Sc3tog, sc, Ch 1, turn
Row 7: Sc3tog, slip stitch in next stitch, Fasten off.
2nd ear flap, join yarn in 22nd stitch after end of row 1 of first ear flap. Follow instructions as above.
Ears
(G hook) and
holding 2 strands of yarn together
With White Ch 3
Row 1: 7 Hdc in 3rd ch from hook. Ch 1, turn (7 hdc)
Row 2: 2 sc in first st. sc in next st, 2 sc in next st, 2 dc in next st, 2 sc in next st, sc in next st, 2 sc in last st. (12 sts) Finish off.
Sew ears over rows 4 & 5, see picture.
Bow
With trim color, Ch 11
Row 1: Hdc in 3rd ch from hook. Hdc in each st across. Ch 2, turn. (10 hdc)
Rows 2- 10: Hdc in each st. slip stitch around. Finish off
Take a long strand of trim color and wrap around the middle of the bow and pull tight to shape bow. Wrap several times. Tie the ends in the back of the bow. Using the yarn needle weave the ends into the bow to hide them. sew onto the hat. Sew the bow to the hat under the ear, see picture.
With White Ch 3
Row 1: 7 Hdc in 3rd ch from hook. Ch 1, turn (7 hdc)
Row 2: 2 sc in first st. sc in next st, 2 sc in next st, 2 dc in next st, 2 sc in next st, sc in next st, 2 sc in last st. (12 sts) Finish off.
Sew ears over rows 4 & 5, see picture.
Bow
With trim color, Ch 11
Row 1: Hdc in 3rd ch from hook. Hdc in each st across. Ch 2, turn. (10 hdc)
Rows 2- 10: Hdc in each st. slip stitch around. Finish off
Take a long strand of trim color and wrap around the middle of the bow and pull tight to shape bow. Wrap several times. Tie the ends in the back of the bow. Using the yarn needle weave the ends into the bow to hide them. sew onto the hat. Sew the bow to the hat under the ear, see picture.
Whiskers
Use a yarn needle to embroider the whiskers. See picture.
Use a yarn needle to embroider the whiskers. See picture.
Braids
Cut three equal-length strands of yarn, each twice as long as you want the finished braid to be, plus a few extra inches.
Cut three equal-length strands of yarn, each twice as long as you want the finished braid to be, plus a few extra inches.
Thread each strand of yarn into the front edge of the
flap, running each strand through one or two stitches to help fix it
in place. Then run the end of the yarn back out of the hat, near the
entry point. Tug on the ends of the strand until they're even.
Bring all six strands together. Treat both ends of
each long, doubled strand as a single unit as you make a three-strand
braid. You will make each "leg" of the braid with two
strands of yarn instead of just one. Once you're done, secure the end
of the braid with a small, tidy overhand knot and trim the remaining
yarn even. This technique is ideal for adding yarn braids to ear
flaps on a hat. See picture.Eyes, make 2 with black
Make
a magic circle. 6 Hdc in ring, join. End off leaving a long tail for
sewing on.
Sew
on the 7th
row with 10 stitches in between each eye.
Nose
with yellow
Make
a magic circle, 6 sc in circle, join, fasten off and leave a long
tail for sewing onto face. Attach in center of face on row 9. See
picture.
Monday, September 10, 2012
Mary Ann's Angel Pattern
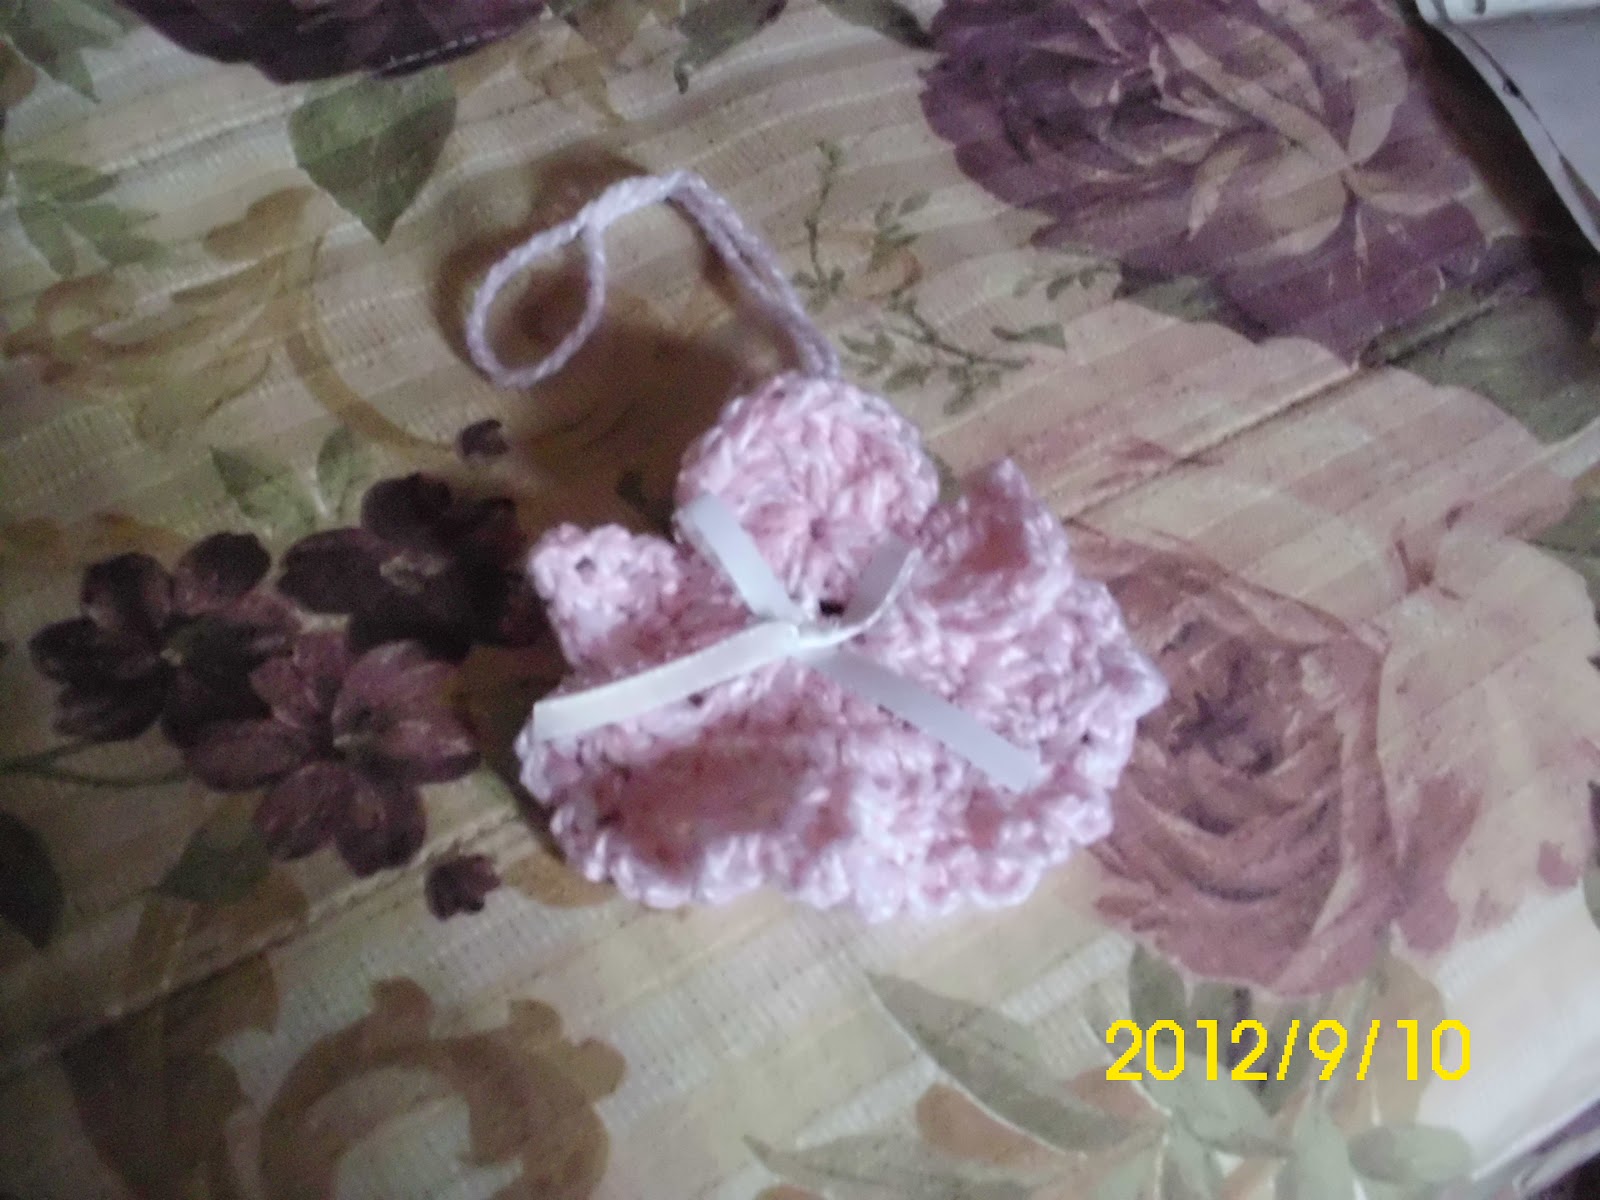

row 1.

Row 2.

Row 2.

Row 2.

09/10/2012
Use G hook, and sport weight or baby yarn.
1. Ch. 4, dc 16 in 4th ch. from hook. Join in 1st dc ( not in top of chain
4) ch. 4 turn.
2. 3 tplc in same space, ch 1, turn. 4 sl down wing, ch. 4, join in same
stitch as tplc's, sl in next st., ch 3, 2 dbl same stitch., 2 dbl next
stitch., ch 3, sl in same st., sl in next stitch., ch 4, 3 tplc same st., ch
1, turn, 4 sl down wing, ch. 4. sl in same space as tpcl's , dbl next
space, join in top of dbl.
3. Ch 3, 2 dbl same st., 2 dbl in ea st across, 3 dbl in end st. ch 1, turn(if you don't want such a full skirt, do 2 dbl ea. end & 1 dbl across)
4. sc, chain 3, sc across.
Fasten off and weave in ends. Tie ribbon around neck. Add tie to back of
head.
**This pattern is for personal use or for charity
Monday, September 3, 2012
Virginia Tech Hokie: Added Pattern

Virginia
Tech Hokie Lovey

Use
4 ply yarn and F hook:
Beak,
using orange yarn, chain 13
Rnd
1. sc in 2nd chain to the last chain; 2 sc in last
chain.
Working
around the chain, 2 sc in one. 1 sc in ea chain to the end. Join
Rnd
2.HDC in 3, dc, tpl, dc, hdc in
3, sc, 4 sc around end.
Rnd.
3 sl in 4sc, hdb, dc, 3 dc
cluster, dc, hdc, sl in 4.
sl
around to top center, ch 10, sc back down the chain. Sl to the end.
Head,
using Hokie Maroon:
RND
1) Ch2, 6 sc in the 2nd chain from hook. Join. (6)
RND
2) Ch1, 2 sc in each stitch around. Join. (12)
RND
3) Ch 1, (sc in next st, 2 sc in next st) repeat around & join.
(18)
RND
4) Ch 1, sc in each stitch around & join. (18)
Part
2-------
Rnd
5) Ch1, (sc in each of next 2 stitches, 2 sc in the next stitch)
repeat around &
join.
(24)
Rnd
6) Ch1, sc in 9 stitches, 2sc in each of next 6 stitches, sc in each
of last 9
stitches.
Join. (30)
Stitch
markers for eye placement
Markers
go under the first and last increase stitches of last round. Which is
the 10th &
16th
stitches of Rnd 5.
Part
3---------------------------
Rnd
7) Ch1, sc in each stitch around. Join. (30)
Rnd
8) Ch1, sc in the 1st 9 stitches, (2 sc in the next stitch, sc in the
next stitch) 3
times,
(sc in the next stitch, 2 sc in the next stitch) 3 times, sc in the
last 9 stitches.
- Add a spike on the top of the head ( see picture)
Rnd
9. ch1, sc 9, hdc; in back loop (dc, 2 trc in one stitch, dc, hdc) sc
to end, join.
Rnd.
10 – 13, ch 1, sc around, join (36 sc )
continue
as follows:
Rnd.
14, Ch 1, ( sc in
4 sts, decrease over next 2 sts) repeat around & join. (30)
Rnd.
15,Ch 1, ( sc in 3 sts, decrease over next 2 sts) repeat around &
join. (24)
Rnd.
16) Ch 1, ( sc in 2 sts, decrease over 2 sts) repeat around &
join. (18)
Add
stuffing now!
Rnd.
17) Ch 1, (sc in next st, decrease over 2 sts) repeat around &
join. (12)
Add
more stuffing!
Rnd.
18) (decrease over 2 sts) repeat around, join & fasten off. (6)
Use tail to sew up
hole.
End off. Embroider eyebrows, nostrils and mouth. Hot glue eyes.
Tail
Feathers (make
3)***
Rnd.
1, With white, ch 3, sc to end, 2 sc in last stitch, continuing
around the end, 2 sc in one, 1 sc till beginning, 2 sc in last (8)
Rnd
2-4, continue around as before adding additional 2sc in each end (20)
Rnd.
5, Maroon,
continue around 8 more rows as above. Fold sides together and sc
across. Fasten off.
Hand-
Maroon-G hook
1)
Ch 2, 6 sc in the 2nd ch from hook. Join (6)
2)
Ch 1, 2 sc in each st around. Join. (12)
3)
Ch 1, (sc in next st, 2 sc in the next st.) repeat around. Join (18)
4)
Ch1, sc in each st around. Join (18)
5)
Ch 1, (sc in next st, decrease over next 2 sts) repeat around. Join
(12)
Thumb
will be added in next round!
6)
Ch 1, sc in 6 sts, 4dc cluster in front loop only of next st, sc in
last 5 sts. Join. (12)
7)
Ch 1, sc in each st around. Join. (12) Fasten off.
Continuing
in Maroon:
1)Sl
st in last st of hand, sc in next 11 sts and same st as sl st. Join.
(12)
2-3)
Ch 1, sc in each st around. Join (12)
Fasten
off.
Arm-White
1)
Sl st in last st made on cuff, sc in each st around including the
first one with the sl st. Join. (12)
2-5)
Ch 1, sc in each st around. Join. (12)
Stuff
now if you want, I don't stuff arms.
Last
row 6) Ch 1, fold piece in half & sc across through both layers.
(6) Fasten off
Repeat
for second hand and arm
Neck-white-G
hook-leave long tail at start to sew onto head.
1)
Ch 2, 6 sc in 2nd ch from hook. Join. (6)
2)
Ch 1, 2 sc in each st around. Join. (12)
3)
Back Loops only Ch 1, sc in each st around. Join. (12)
4)
Ch 1, sc in each st around. Join. (12) Fasten off
Sew
onto bottom of head using beginning tail & leftover front loops
of rnd 2.
see
picture
Body-
Body-White-G
hook
1)Join
red with a sl st in st to the right of center back st.
(sc
in next st, 2 sc in next st) repeat around. Join. (18)
2)Ch
1, (sc in next 2 sts, 2 sc in next st) repeat around join. (24)
Place
stitch markers for placement of arms.
Markers
go in stitches 5, 12, 14 & 21
Attaching
arms this round! Attach feathers between
arms***
3)
Ch1, sc in 5 sts, hold 1st arm against body as shown in pic, sc
through both layers in the next 6 sts
making
sure thumbs are pointing toward the center part of face, sc in next 3
sts on body, hold 2nd arm
against
body & working through both layers sc in 6 sts, sc in last 4 sts.
Join. (24)
Using
H hook:
4)
Ch 1, (sc in 3 sts, 2 sc in next st) repeat around. Join. (30)
Place
marker in 1st st of last round, we will need that later to start the
blanket.
Work
this round in back loops only!
5)Ch
1,(sc in 3 sts, decrease over next 2 sts) repeat around and Join.
(24)
6)
Ch 1, (sc in 2 sts, decrease over next 2 st) repeat around &
join. (18)
7)
Ch 1, (sc in next st, decrease over next 2 sts) repeat around &
join. (12)
8)
Ch 1, (decrease over next 2 sts) repeat around & join. (6) Fasten
off and use tail to sew up hole. Push this part up inside body.
Lovey
blanket, Maroon, using H hook
1)
Join with a sl st in st to right of marked st, (sc in 4 sts, 2 sc
in next st) repeat around & join. (36)
2)Ch1,
sc in next 2 sts, *hdc in next st, (2dc,ch 2, 2dc)in next st, hdc in
next st, sc in next 3 sts* work
from
* to * 5 times, hdc in next st, (2dc, ch 2, 2dc) in next st, hdc in
next st, sc in last st. Join & fasten
off.
Should
have 6 shell points.
Rnd.
3 using white
Join
with a dc in ch 2 space to right of marker, (dc, ch 2, 2 dc) in same
ch space, dc in next 3 sts,
skipping
next 3 sts, trc around post of sc 2 rounds below as shown in picture,
dc in next 3 sts before ch
space,
(2 dc, ch 2, 2 dc) in ch space. Repeat this pattern around &
join. Fasten off
Rnd.
4, maroon
(2
dc, ch 2, 2 dc) in corner ch space, dc in next 4 sts, treble decrease
worked over leftover red scs 2
rounds
below, dc in next 4 stitches before ch space. Repeat around and join.
Rnd.
5, white
(2dc,
ch 2, 2 dc) in corner ch space, dc in 5 sts, 2 dc front post
decrease, dc in next 5 sts before corner
ch
space. Repeat around and join. Fasten off green.
Rnd.
6, maroon
(2
dc, ch 2, 2 dc) in corner ch space, dc in next 3 sts, quadruple front
post around st 2 rounds below, dc
in
2 sts,* ( decrease)-
front post dc half worked leaving last loop on hook, front post trc
half
worked leaving last loop on hook, front post dc half worked leaving
last loop on hook, pull a loop
through
all 4 loops on hook), dc in 2 sts, quad front post, dc in 3 sts.
Repeat for pattern & join.
(the
front post dc is around the next dc, the front post tr is around the
Treble decrease of Row 4,
then
the last front post dc is around the dc on the other side of the
valley. Remember to leave the
last
loop of each stitch on your hook and draw through them as you
complete the last front post
dc.
)
Rnd,
7, orange
(2
dc, ch 2, 2 dc) in corner ch space, dc in 7 sts, front post dc
decrease, dc in 7 sts. Repeat around. Join.
Fasten
off.
Rnd
8, white
(2
dc, ch 2, 2 dc) in corner ch space, dc in 2 sts, quad front post, dc
in 2 sts, quad front post, dc in 2 sts,
chick
foot decrease, dc in 2 sts, quad front post, dc in 2 sts, quad front
post, dc in 2 sts. Repeat around
&
join.
Rnd
9, maroon
(2
dc, ch 2, 2dc in corner ch space, dc in 9 sts, front post 2 dc
decrease, dc in 9 sts. Repeat around &
fasten
off.
ENJOY
Tuesday, July 31, 2012
Tuesday, July 24, 2012

Friday, March 30, 2012
My original pattern..mixer cover


http://maryannscrochet.blogspot.com/
G hook
Lily 100% cotton yarn
6 balls softly taupe 4oz ea. (main color)
1 ball indigo (accent color)
the only stitch is single crochet (sc) increase (inc) decrease (dec)
This pattern is done in rounds. Always join at end of round. Put a stitch marker in the join stitch
to remind you NOT to sc in that stitch.
With main color:

1. chain 65, sc in 2nd ch from hook to end, 4 sc in last stitch
2. sc around other side, 3 sc in last stitch, join
3. thru 24. ch 1, sc in same stitch ( join at the end of each round, then ch 1, sc same stitch)
25. ch. 1, 1 sc. Same stitch, sc in next 3 stitches, increase. Sc in next 4 sc, inc around,join
26. ch. 1, change color, sc in same stitch, sc around, join
27. ch. 1, change color, sc in same stitch, sc next 2, inc, sc next 3, inc around, join.
28. Repeat row 26
29. ch. 1, change color, sc in same stitch, sc next sc, inc, sc next 2, inc around, join.
30. repeat row 26
31. ch. 1 change color, 1 sc, inc., 1 sc, around, join (main color)
32. ch. 1, sc in same stitch, sc around, join
33. repeat 32
34. repeat 32

35. repeat 26
36. repeat 27
37. repeat 26
38. repeat 27
39. repeat 26
40. thru 52 sc around in main color
now we start to decrease
53. ch. 1, sc same stitch, sc in next 4, dc. Sc in next 5, dec. around, join
54. ch 1. sc same stitch, sc around, join.
55. ch 1. sc in same stitch, sc in next 3, dec, sc in next 4, dec around, join
56. repeat 54
57. ch 1, sc in same stitch, sc in next 2, dec, sc in next 3, dec around, join
58. repeat 54
59. ch. 1, sc in same stitch, sc next stitch, dec, sc next 2 stitches, dec around, join
60. repeat 54 until you reach desired length. Change color. Sc around. Fasten off.
(approx. 80 rows total)
This is my original pattern. You may sell any items made from this pattern, but please don't
claim it as your own. You may not sell the pattern.
Mary Ann Von Aschen
March, 2012
Mary Ann's Crochet
http://maryannscrochet.blogspot.com/
Subscribe to:
Posts (Atom)